
Winter is coming!
As you may have guessed, it's not going to be easy for your bees.
The frost, the moisture, the possibility of famine, and even the dreaded Varroa Mites are going to make this the biggest battle of their lifetime.
To help you get them ready, there are many steps that you can take to make your bees as prepared as possible.
It used to be the case where bees could survive through winter without the help of beekeepers, but things are different now.
We've taken them out of their natural habitats.
We've put them into man-made boxes which leads to man-made issues.
We need to help the bees survive the winter as much as we can.
This article is chock full of recipes, recommendations, signs to watch for, explanations, instructional YouTube videos, and multiple answers to different issues so you can have the freedom to choose what's best for you and your bees.
Please note that this article is a guideline and won't apply to everyone the same way. The winter you have in your region is likely going to be different than the winter in someone else's neck of the woods.
Below is a Table of Contents that you can use to skip around to any of the different topics that you'd like some advice about.
Good luck beekeepers!

Table of Contents (Click to Skip Around)
How Do Bees Survive the Winter?- An Incredible Food Source
- Muster the Cluster
How Do Bees Prepare Themselves for Winter?
How Do Beekeepers Help Prepare Bees for Winter?
When Should I Start Winterizing My Bees?
- Check Your Queen
- Varroa Mite Count
- Pollen Count
Why Should I Condense My Beehive?
- How to Condense My Beehive
- Tilt Your Hive & Remove Queen Excluder
Defend Your Hive!
- Mice
- Robber Bees
- Wasps & Hornets
Feed Your Bees
- Signs You Should Feed
- What to Feed
Protecting Against High Winds
Ventilating Your Hive
Insulating Your Hive
Feeding & Inspecting During Winter
How do bees survive the winter?
During the sunny months of spring, summer and fall bees spend a majority of their lives collecting nectar to make honey out of it.
Like little alchemists, they turn this insignificant ingredient into a precious resource.
But why? Why do they go through all the trouble of devoting their days to making honey?
An Incredible Food Source
They do it to survive the winter!
Honey bees have been designed to make a resource that has a limitless shelf life!
To prove just how amazing honey is, consider how archeologists found honey in the Egyptian burial tombs under a 3,000-year-old pyramid.
It's still safe to consume!
Also, in 2003, the world’s oldest honey had been discovered in the country of Georgia and is said to be 5,500 years old!
Incredible right?!
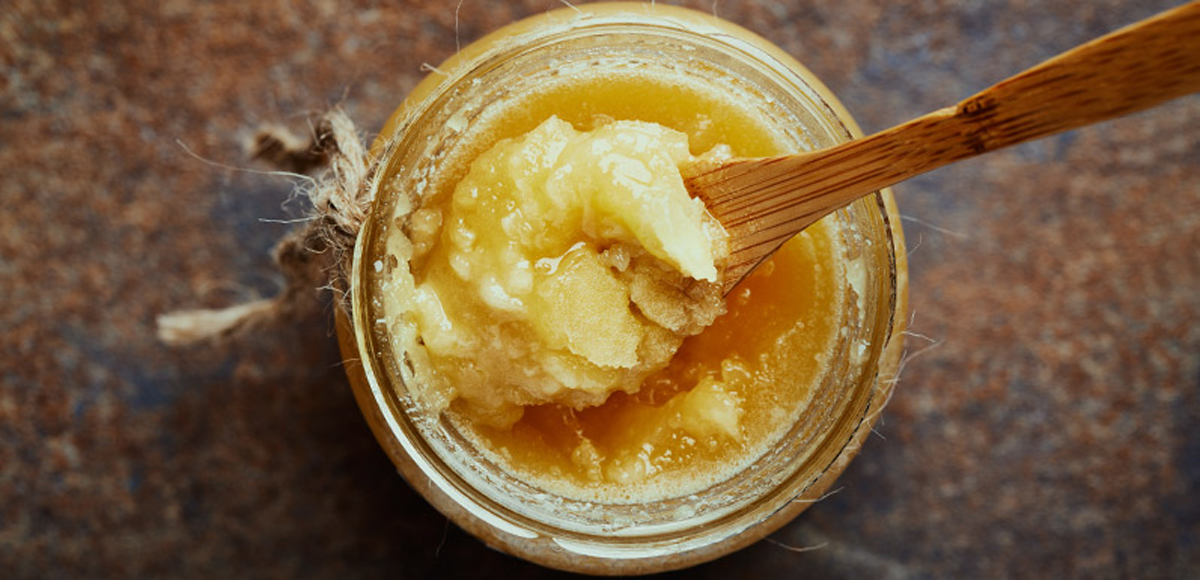
Beyond its longevity, honey is also known to make it through extreme temperatures during the winter.
So when there is no food or water in sight, bees can rely on the honey they've stored for energy.
Click here to learn how to restore it.
Muster the Cluster
Bees freeze to death when their core temperature hits 41 degrees Fahrenheit.
So how do they keep warm when it's below 20 degrees outside?
Unlike bumblebees, wasps, yellow jackets, and other pollinators honey bees don't hibernate.
The social community of bees has discovered that they can huddle around the queen and shiver to stay warm.
Yep, just like humans do, they begin to shake when they get cold.
They do this for the very same reason that we do - to get their muscles moving and provide some heat from the friction.
By gathering together in a mass that's called a "cluster" they can share the heat they produce together.
As the worker bees cluster around the queen they keep her safe and warm.
The worker bees will then rotate in and out of the middle of the mass so that none of them are left out on the frigid fringes.
At the center of the cluster the queen comfortably remains at 90 degrees (F), just how she likes it.
The cluster moves around as a whole to different areas of the hive to find honey stores and recoup their energy.
Click here to learn more on winter worker bees.
How Do Bees Prepare Themselves for Winter?
Besides hoarding honey, the bees do quite a few things things to prepare themselves for winter.
Queen Stop Laying Eggs
Depending on the species that your bees are and how much pollen flow is still going on in your area, the queen can stop laying eggs all together or severely slow down.
If she kept going at full force, they'd run out of food before making it through March.
Another reason she slows down is because brood eggs end up dying at 55 degrees. If she kept laying all through out the hive, the cluster couldn't keep the eggs warm enough to survive.
Unfortunate End for Drones
Drones, male bees, will follow one of two fates.
Either they die directly after mating or they'll be evicted from the hive as soon as the pollen flow slows down in late summer.
Other than providing genetic diversity, the worker bees have no use for drones because they just take up space and food supplies.
Fatter Larva
The larva develops into fatter winter worker bees.
These fatter bees have longer lifespans. While a worker bee during the spring and summer live to about 6 weeks; winter bees live to about 6 months.
This helps them out drastically because the queen doesn't lay very many eggs, if any, during winter.
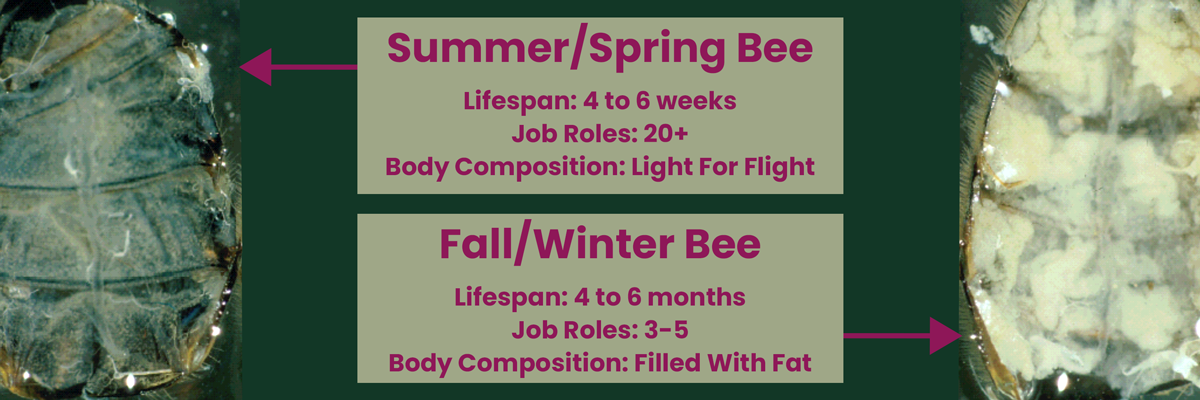
Image from Scientific Beekeeping
How Beekeepers Help Prepare Bees for Winter?
In the wild, the bees natural habitat is ideally found in a hollowed out tree.
During winter time, a tree can provide 2 clear benefits that man-made beehives can't.
1. Natural Insulation
The wood on a tree can be multiple inches thick, while the wood in a standard beehive is about 3/4" thick.
This thick layer of wood helps shelter and insulate your bees a lot better than a man-made beehive would.
Insulation provides protection for your bees from the frost making it so they don't have to work as hard or eat as much honey for energy.
2. Dry Home
Trees are often times still living, which means they're still taking in water even in winter.
The tree will naturally soak up any extra moisture that the bees let off.
This prevents the water from falling back onto the bees. This may not seem important, but a wet cluster during winter can end in your whole hive dying from hypothermia.
The amount that we need to help depends on how cold your climate is, how late in the year you have a pollen and nectar flow, and if you purchased overwintered bees.
We'll spend the rest of this article talking about insulation, ventilation and a few other steps that we can take as beekeepers to help prepare bees to survive winter.

When Should I Start Winterizing My Bees?
The earlier you start preparing for winter, the better off you'll be.
A few questions you should start asking when you're approaching August should be.
- Is your queen still laying eggs?
- How high is your hive's Varroa Mite count?
- How much pollen is still in your area?
By asking these questions, you can gauge how much extra work you'll need to do to get your bees ready for winter.
Check Your Queen
In late July, it's likely you've already done multiple thorough inspections of your hive.
At this point in the year, it's crucial to see if your queen is still around and that she is laying eggs.
Here in Ohio (zone 6), we expect her to continue to lay eggs till sometime in October. This will vary depending on your climate and species - in some southern states the queen never stops laying.
The reason it's important that you check for her long before winter hits is because she needs time to lay her fatter winter bees.
Another reason is that if she isn't there, then you'll have to make some quick decisions on how to replace her.

If your queen isn't around there are three options for your hive:
Buy a new queen.
To buy a queen you'll need to get a hold of a local beekeeper or their organization.
Simply type in "[Your County] Beekeeping Association" into Google and something should pop up. If not, you can always look for your closest beekeeping association here.
These associations will likely be able to point you in the right direction to a local beekeeper, if they don't have any to sell themselves.
Make a queen from another hive's eggs.
This option isn't as difficult as it sounds.
You'll just take a deep frame that has freshly laid unhatched eggs from a queen-right hive and place it into the hive that doesn't have a queen.
Be sure to knock off any of the nurse bees before placing it into it's new hive.
The bees from the queenless hive will elect one or several of the unhatched eggs to become queen larva by solely feeding them Royal Jelly until they are capped.
If in a few days you don't see any queen cells being formed, then you'll have to add in another frame of unhatched eggs for the nurse bees to try again.
Combine two weak hives into one.
Combining two hives can be a great idea when you have two weak colonies that haven't done well this year.
You'll need to check to see if at least one of the hives has a queen.
If both hives have a queen, you'll need to dispatch or sell one of them and wait a few days before combing so the pheromone dissipates.
When you're ready to combine:
- Cut a few thin slits into some 2 layers of newspaper
- Take off the covers of the "queen right" hive
- Add these layers of newspaper directly on top of the frames
- Place the queenless brood box ontop of the newspaper
- Put the covers on to the new top most box
- Make sure to slide the telescoping top cover back so that it blocks off the inner covers top entrance
Over the next few days, the bees will slowly eat through the newspaper to get to the brood box below. During this time the bees from the queenless hive will adapt to their new queen's pheromones.
If you don't add the newspaper, the two colonies would kill each other.
Varroa Mite Count
Varroa Mites can be a nightmare to beehives during the winter months.
There's a reason their scientific name is Varroa Destructor and it has to do with how much damage they can cause your hive, especially during winter.
Like a tick on a dog, these mites latch on to your bees and slowly start eating them alive.
The Varroa Mites, eat on the very same fat that has extended your winter bees lifespan to 6 months.
If the bees lose enough fat, they won't make it through winter.
On top of that, the Varroa Mites can carry nearly 20 different diseases that harm your bees.
If you lose too many bees from these mites, then your hive won't be able to keep warm.
You'll want to test your bees and treat them if necessary. Start early, preferably in late July or early August so you still have ample time to treat or change things as necessary.

Pollen Count
The next determing factor for when you should start to winterize your bees is to look out how much pollen/nectar is left in your area. Taking a pollen count is not nearly as scientific as a mite count. It is more of a general observation of your local environment. Even still, it should be considered before condensing your hive.
If there is not much pollen left in your area for the year, then you might consider feeding your bees. If your hive is more condensed while feeding your bees, you'll be able to direct them to fill up the frames that are necessary (deep brood boxes) rather than spending time in the honey supers. For more on how or what to feed your bees, see the section below titled What to Feed (Click Here).
As a beekeeper you'll become more and more aware of the different pollen flows throughout the year in your area. A great place to start is with the interactive infographic that NASA created on their own website. While there, you'll be able to click on the state and region you're in and see what time of year the plants in your area bloom.
Familiarize yourself with these plant so you can look for them in your area. Remember bees travel as far as 6 miles for pollen and nectar sometimes. If you see any of these plants are still blooming and your bees still have sacs full of pollen when they return from foraging, then you can probably wait a little while longer before closing up the hive for the year.

Here in central Ohio, we have a late Golden Rod pollen rush starting at the end of June and going through October. So it's always a difficult decision to make as to if we wait till after the pollen rush to condense the hive or do it beforehand. For this reason, our timeline to condense the hives heavily weighs on how high are Varroa Mite Count is.
Why Should I Condense My Beehive?
After you've checked on your queen, taken into account the number of mites you have and looked at the amount of pollen that is still readily available in your area, it might be time for you to condense your hive.
There are plenty of reasons why beekeepers condense their hives in the fall instead of leaving the honey for the bees till the springtime.
For a sturdier hive. One of the main reasons is because it makes them less susceptible to being overturned by the wind. A tower of bee boxes is just asking to get knocked over by a strong gust. For more on this, skip on down to Protecting Against High Winds (Click Here)
More effective mite treatments. Condensing your hives before treating for mites can make your treatment more effective because the bees are less spread out. It also keeps your honey from tasting like the treatment as well.
The honey is easier to yield. Honey can crystallize if you leave it in the beehive through the winter. While the bees can still eat the crystallized honey, it makes it very difficult for beekeepers to get it out of the cells.
Bees will be warmer. Another reason to condense your hives is to enhance your bees ability to keep warm through the winter. Condensing your hive leaves your bees at the same population, while making the area they have to heat up smaller. The smaller area means that the ambient heat that the bees create will also heat up the walls and covers. If the covers are warm, the moisture in the hive won't turn to water droplets when they float to the top and make contact with the covers. This means it helps prevent the freezing cold water from driping back down onto the bees. This results in a higher percentage of beehives surviving a tough winter.
After you've condensed, continue to check for queen eggs regularly. If you see any, get rid of them. If a queen emerges, it will mean that your bees will swarm. The last thing you want is a late swarm - it's likely neither the swarm nor the old colony would survive through the winter. Follow the old wives tale "A swarm in June is worth a silver spoon, a swarm in July ain't worth a fly."
How to Condense My Beehive
Some beekeepers worry about leaving too little honey for their bees to make it through the winter. While its good to err towards being cautious, it's often still a good idea to condense your hive down a bit. In general, we recommend condensing down to 1 deep brood box for those of you who live in the South (Zones 7-11) or 2 deep brood boxes if you live in the North (Zones 3-6).

This is a broad stroke, but the Southern states would do well with just 1 deep brood box because they usually don't need as much honey stored to make it through the winter due to their extended pollen seasons. The North on the other hand will need some extra food, bees can eat up to 80 lbs of honey in the winter.
Once you've decided how many boxes you're going to keep you'll need to take off the rest of the boxes above that. When you condense your beehive, please be sure that the frames that you leave are filled with honey and pollen. Don't just leave them with empty frames, there is likely not enough time left in the year for your bees to fill them up.
In order to condense your hive, you'll want to first expel the bees from the bee box you're removing. To do this, you can either take the frmames out one by one and brush the bees off or you could simply use a bee escape.
Using a bee escape doesn't harm the bees and only takes 24 hours to remove over 95% of the bees from a bee box, there of course will be a few stragglers. With every Nubee and Hoover Hives kit we sell, we've included an Oval Bee Escape.
We've written a step by step article on how to install, use, and remove an Oval Bee Escape: To learn more, click here to go to "How Do I Use an Oval Bee Escape?"

Once your bees have escaped, then you'll have a vacant or nearly vacant bee box of frames filled with honey. Take some of these bee-less frames and fill up other spots in your hive(s) that could use some more honey.
After you've filled up the deep boxes you want to keep on the hive, then the rest is yours to harvest.
When using a bee escape, do not leave the escape on your hive for more than 24 hours. This can result in ungaurded honey, which will attract unwanted guests like ants, small hive beetles, and wasps.
Tilt Your Hive & Remove Queen Excluder

While you're condensing your bee boxes, this would be a great time to tilt your hive!
Tilting your hive will create a slope for the water and snow to come out of the entrance way. Without tilting your beehives there is potential for there to be a lot of humidity stuck on the top of your bottom board. This is not good because as you'll see humidity is the number one reason why colonies die in the cold months. For more on dealing with humidity, skip down to Ventilating Your Hive (Click Here).
During the winter, the bees usually aren't making comb anyways so tilting the hive to a 15 degree angle is not going to have any adverse effects on the direction they build their comb.
To tilt your hive, you'll just simply put a flat sturdy stone or wooden wedge under the back side of your hive so that the opening is the lowest point in the hive. You don't need to lift it more than two or three inches, otherwise it may become unstable.
At this time, it'd also be a good idea to remove the Queen Excluder if you are using one. Your queen will need access to the whole hive to follow the honey seeking cluster.
Defend Your Hive!
There are plenty of pests and predators that love to snack on bees or their honey. A few of these predators get significantly worse as winter rolls around. Let's take a moment to mention them and tell you a bit about how to get rid of them.
Mice
Even before it starts to get cold in your area, mice are scouting out their winter homes. When they find one they like, they'll urinate to mark the place with a scent. Once it gets cold, they'll return to the mark and make a nest.
Beehives are an ideal place for mice to stay for the winter. I mean, who wouldn't want a nice supply of food and a furnace of bees to keep you warm during the cold months.
Mice don't actually eat bees, but they will make a big mess out of the drawn comb. They'll eat the honey that your bees have worked hard to store. And, they'll be gone before the winter cluster breaks so they don't suffer the repercussions of the giant they've been sleeping under.
In early autumn (around September) once the pollen is about gone, it would be a good idea to trade out your wooden entrance reducer for a mouse guard. Mice will eat right through your wooden entrance reducer, so make sure you find a metal one.


Your best defense is to prevent mice from getting in your hive at all. If you are late to the game, you can try taking a metal rod or an unfolded metal hanger and sweep the bottom floor through the entrance. This should scare off any mice that might be nesting on the bottom. Once you've swept, then put the mouse guard on.
Robber Bees
In the Summer and Spring the pollen is plentiful, but as the pollen starts to dwindle foraging bees turn towards other hives for their food sources.
They can quickly become a problem and leave a weak hive without any honey. They have also been known to kill queens. If you see robbing going on, you should fix the issue immediately.
Robbing bees can be hard to distinguish from other bees, but there are a few signs:

- Flakes of beeswax will be on your bottom board and on the ground in front of your hive. This is a sign that the waxed capped cells are being violently opened up and stolen from
- There's a higher pitch and frequency to the hive in panic
- The bees are not leisurely coming and going, there is a frenzy happening at the entrance like a crowd at a good sale on Black Friday
- Robbing bees come to the hive without pouches full of pollen
- They leave the hive full of honey so you can see the normal characteristic of a drop in their flight pattern. They may even climb up the hive a little bit so they can start from a higher position
- Bees can be seen fighting the guards at the entrance to the death
- They are quickly in and quickly out without hesitation
- If the bees don't react to your presence, then they probably aren't the residents
If you notice these signs then you'll want to do one or more of the following:
- Put your entrance reducer on your hive and turn it to the smallest opening. This allows your guard bees to have a better chance of protecting your hive. While you're at it, face the entrace upwards. This is a good position to have it for the winter because as bees naturally die, they may block the entrance way. So by facing the entrance upwards, your bees will be able to walk out of the hive and do cleansing flights when the temperatures allow them to
- You can relocate your hive while they are being robbed. Since robbing bees always go back to their hives and tell the rest of the colony where the food source is located. It may be a good idea to move the victim hive, at least temporarily.

- A third option is an interesting solution from Beekeeping for Dummies "Soak a bed sheet in water and cover the hive that's under attack. The sheet (heavy with water) drapes to the ground and prevents robbing bees from getting to the entrance. The bees in the hive seem to be able to find their way in and out. During hot, dry weather, rewet the sheet as needed. Be sure to remove the sheet after one or two days. By that time the robbing behavior should have stopped."
- Continue your community feeding. Many beekeepers experience hive robbing after they run out of sugar syrup that they've been feeding to the larger bee population. This is because a large amount of foraging bees have been attracted to your area and are now seeking food in your bee yard. If you start community feeding, you can't stop till winter hits
A good tip to help prevent bee robbing is to feed your colony within your beehive, not on the landing strip or by using a community feeder. See the section below called - What to Feed (Click Here) to learn more about what and how to feed your bees.
Wasps & Hornets
Wasps and hornets are both looking for a bite to eat. They enjoy sweets as well as meats. So if you have a bad infestation nearby, it might be a good idea to try to get rid of them before you start feeding your hives. Both wasps and hornets will eat your bees if they're given the chance.
To get these pests out of your bee yard you might want to try to make a trap that contains a meat lure. This should help take out some of the wasps and hornets while leaving your bees.
There are plenty of wasp lures out on the market, like W.H.Y. (Wasps, Hornets, and Yellow Jackets) and Pic Pest-Free Living Wasp and Hornet Trap, but the one we recommend is the hidden gem at the end of this video.
- Take a small plastic tub and fill it with water until your two inches from the top and add soap to it
- Then take a plank of wood and attach some raw unflavored chicken to it using screws, nails, or staples
- As the flying predators pull off the chicken piece by piece, they normallly fall a few inches before catching themselves
- But this time the water and soap are there to catch them before they catch themselves
- Soon enough you'll have a few thousand predators caught up in the soapy water
Feed Your Bees
Feeding is a relatively simple step in the process of winterizing your bees. For most first year hives, this simple step will be an absolutely necessary. If your bees don't have enough honey in their hive, they won't make it through winter.
Signs You Should Feed
Sometimes determining when you should feed can be difficult, but here are some signs you should look for.
- Low pollen count. If by the time August rolls around the pollen count is low in your area or your going through a dearth, you'll likely want to feed your bees
- Furthest frames are unfilled. If the furthest two frames (frame 1 and 10) in their bee boxes aren't filled with honey by Early August, you should feed your bees. These furthest frames are usually the first to get filled with honey through out the year. If they're not filled - you'll have winter problems if you don't feed
- Second box is empty. If you live in the North and you're keeping a second brood box on your hive, you'll want it to be completely full. This could mean taking full frames from other hives and placing them in this second bee box. It could also mean you should feed your bees. You should keep in mind realistic expectations though because your bees aren't going to be able to draw out comb and fill the whole box with honey in the couple months you have left. Try as you might, you may need to just condense down to 1 full brood box and feed them a ton
If neither of your brood boxes have full frames of honey, it might be time to combine this hive with another. Skip back up to the bottom of the section titled Check Your Queen (Click Here) to learn how to combine your hives.
When going through your frames, please note that frames that seem empty in the middle of the bottom brood box aren't always a bad sign. These cells are for the queen to lay eggs during late fall and once Spring rolls back around. Also, some species (Carniolans and Russians) of bees have been known to lay eggs in the winter, so she'll need a frame or two in the center of the brood box to lay.
What to Feed
Below is a list of food options that you can choose from to feed your bees. Whichever food option you choose to feed your bees, we have two recommendations we'd like to make:
- Use Fumagilin-B in your first feeding. This is a medication for one of the most common diseases that bees get, Nosema. Nosema is a sickness, much like dysentery to humans, that bees get when they have parasites in their digestive tract. When your bees have it, you'll notice streaks of yellow and brown on the outside of the hive, although once you've seen symptoms you're a little late to the game. This medication should be proactive, not reactive. While medicating, follow the instructions on the bottle. Most beekeepers add Fumagilin-B to the first sugar syrups of the year and the first of the fall feeding. Some beekeepers go as far as to spray the medicated syrup directly on the bees because, like humans, the bees will avoid taking their meds.

- The second recommendation we have for any feeding you do is to feed your bees inside of their own hives rather than having a community feeder. The reason for this is twofold: it prevents wasps and robbers from coming by as well as prevents the spread of diseases like Nosema and Varroa Mites between hives. Although, if you're in a pinch, it is still better to feed the community rather than not feeding them at all.
Sugar Syrup (March - October) - For most beekeepers, if they're going to feed their bees anything, they'll choose a simple sugar syrup. Throughout the Spring and Summer the consistency is usually a 1:1 ratio of sugar to water. Using a 1:1 ratio encourages the hive to produce more wax and encourages the queen to have more production. During the fall when the queen slows down though, this should be bumped up to contain 2 or even 3 parts sugar and 1 part water. The thicker syrup will make it easier for your bees to convert it into capped honey because they don't have to evaporate as much water.

To make a fall sugar syrup you'll bring water to a boil, turn off the burner and then add 3 times the amount of sugar than water. (If you don't turn off the burner, you run the risk of caramelizing the sugar which can make the bees sick). Mix it up till it's smooth. Then let it sit till it gets to room temperature. Don't feed your bees scolding hot syrup.
Once it's at room temperature you can pour the contents into a mason jar. Find a lid for the mason jar and poke a staple through the lid to create two small holes (more holes may make the water leak out too quickly). Once you've put the holes in the lid, remove the staple, put the lid on and take it out to the beehive. There you will put the mason jar upside down on top of the inner cover's cut out hole so that the syrup slowly drips into your hive. Put a medium bee box (without frames) around the mason jar and sitting on the inner cover. Lastly, put the telescoping top cover directly over top of the medium bee box.
Liquid feeders like this one are not recommended during the winter months. If your temperatures get below freezing, then the glass jar may shatter. Also, the added moisture in the hive may be detrimental and the sugar syrup could act as an ice cube that keeps your hive colder than it should.
Powdered Sugar (At Least 3 Times Per Year) - We recommend feeding the bees with powdered sugar multiple times a year because it has an extra benefit of taking care of some of your Varroa Mites.
To feed your bees powdered sugar you'll take your bag of powdered sugar out to the bee yard with a measuring cup. Then you'll crack open the top cover and inner cover of your hive. Take off all of your hive boxes except the bottom one (you should start from the bottom and work your way up). Then you'll take 2 cups of powdered sugar and shake it evenly over the frames allowing the sugar to fall in between each frame. Brush off the powdered sugar that gets caught on the tops of the frames into the gaps between the frames. Place your next box back on to the hive and shake another 2 cups of powdered sugar over all of those frames. Once all boxes have had a dose of powdered sugar, you can then put your covers back on and walk away. The bees will groom each other and clean all of the powdered sugar up by themselves.
Sugar Patties (Any Time) - This kind of food is easy to make and work with. You likely already have all the ingredients you need for it too. You'll want an 11:1 ratio of sugar to water. In measurement terms this can equate to 5 lbs of sugar to 7.5 ounces of water. You'll mix all of this up until its a little clumpy. Then you'll take the clumps and mash them into about a hamburger size patty of sugar.
Take a couple patties per beehive out to the apiary. Then take off the telescoping top cover and inner cover. In a corner of the hive, plop a patty right on top of the frames. If you have leftovers, you can freeze them.

Many beekeepers believe that if they add in essential oils such as spearmint, wintergreen mint, lemongrass, or tea tree oil, their bees will be healthier. This is something that you might want to explore and experiment with.
Dry Sugar (October - March) - Regular sugar granules are an excellent food to feed your bees throughout the cold months. It has the extra benefit of soaking up moisture within the beehive. As you'll learn in the section: Ventilating Your Hive (Click Here), moisture is the number one killer of beehives throughout winter, so having a nice pile of sugar on the top of the frames or the inner cover can keep freezing cold water from dripping back on to the bees.
Take a few pounds of sugar out to the bee yard with some newspaper. Crack open the covers and place the newspaper directly on the frames or on top of the inner cover. Then pour on the sugar.

Some beekeepers will use something called a feeder board which is kind of like a medium bee box, but instead of being 6-5/8″ tall it's about 2" tall. They'll put this feeder board on top of the inner cover so that the bees have some extra loft to be able to walk around the sugar filled inner cover, but you would be fine without it. The bees will come up between the frames or the cut out in the inner cover and find the food when they need it.
Harvested Honey (March - October) - Only use honey from your own apiary! Please don't use store bought honey as this can have side effects and diseases that your bees might get.
Take some newspaper and honey out to the bee yard. Take off the telescoping top cover and inner cover. Then put the newspaper directly on the frames and pour some of the honey out for your bees to eat. Then close up the hive so that predators don't come after it.
Crystalized Honey (March - October) - Only use crystalized honey from your own apiary! Bees don't mind crystalized honey. They'll just mix it with water and rehydrate it before they consume it.
Similarly to the sugar syrup, you'll want to take the telescoping top cover off of your hive and place the jar of crystalized honey on top of the inner cover. Lay this jar on it's side so the bees can crawl into it to clean it out.
Then place a medium box without frames on top of the inner cover and put the telescoping top cover directly on the medium box. With this method, the bees have free reign within the empty medium box, so you might want to check on it often because they will likely make burr comb in the box.
Grease Patties (Any Time) - Grease Patties are usually made with a combination of Crisco and Sugar. West Virginia University has been doing extensive studies on the effectiveness of this recipe on Varroa and Tracheal Mites and have seen some positive results. Below is the recipe that they use on their own bees.

To place the patty in the hive, you'll want to take some newspaper and the patties out to the apiary. Place the newspaper directly on top of the frames and place a patty on the newspaper. Be sure to use protective gloves while touching the patties because the wintergreen oil can cause skin irritation in some people. After placing the patty, you can close up the hive.
The wintergreen oil may also effect the taste of your honey. For this reason, most people don't add the wintergreen oil until after they've condensed the hive.
Fondant Icing (Any Time) - Fondant Icing can be easy to make or get a hold of from your local grocery stores. If you decide to use this food source, try to find white or organic icings so that you're not adding dyes to your bees diet.
Take some newspaper and the icing out to the bee yard. Put the newspaper directly on the tops of the frames and then put the icing on the newspaper. Then close up the hive.
Pollen Patties (March - July) - While feeding pollen patties in the spring and summer is a good idea, we don't recommend feeding your bees pollen patties while we're nearing winter. The reason is because the lack of pollen in the hive is one of the signs that your queen receives to stop or dramatically slow down her egg laying. If she doesn't slow down/stop then there will be too many bees in the hive and not enough food to eat. Another reason to have a slow down is because the fat bees that are born need to retain the Vitellogenin (fat) that normally depletes while feeding the brood. If there is less brood, they'll be able to keep their fat for themselves. See more on Vitellogenin at www.ScientificBeekeeping.com
To make pollen patties, you'll just take store-bought pollen and mix it with a little bit of sugar syrup.
To feed pollen patties you can lay a newspaper down on top of the inner cover or the frames. Place the pollen patties on the newspaper so you can feed them within their own hive.
Once July rolls around, you'll want to stop feeding them pollen patties so that they can naturally transition into their fall and winter eating cycles.
Protecting Against High Winds
I'm not sure if it's windy in your area, but here in the North East we see plenty of trees blow down during this time of year. As a beekeeper, you should know that the wind can be so fierce that it can even knock your heavy hives over.
If a hive was to fall during winter all the heat from your hive would be released. It's likely the bees wouldn't survive unless you notice the fall quickly. For this reason, it's important to help protect your hive from the brutal winds of winter.


To help your hive, we have three recommendations.
- You can simply place a very heavy stone on top of your hive. A cinder block can help your hive stay upright in the wind. Sometimes this is enough to make the difference. Unfortunately, in wind stricken areas like Ohio, we need a bit more than that
- You could try strapping your hives down. Straps can make an even bigger difference than option 1 because it anchors your hive down to the ground. Using straps will give your hive protection on two different sides as the strap goes over the top of the hive. See picture.
- The third option may be seen as drastic measures, but if your wind is bad enough, we recommend creating a wind barrier. Some people use bales of hay as an affordable way to make wind barriers, but they can attract mice - so be sure to use the mouse guard on your hive if you're going to use hay. Some beekeepers create an elaborate fence to keep the landscape of their yard looking beautiful. I've even seen wooden pallets repurposed and angled against each other to direct the wind right over the hives
However you choose to reroute the wind, it's probably best to do it sooner than later. You can even combine these options for extra hive insurance.
Ventilating Your Hive
It's not just the cold that can kill you honey bees, the moisture can too. Moisture has a tendency to gather under your inner cover and turn into freezing cold water. Once it has gathered, it drips down on to the cluster below. Much like humans can suffer hypothermia from getting wet in the cold, the bees can't handle being wet in the winter's cold and unforgiving environment either.
Moisture can also lead to a cold, humid and clammy breeding zone for airborne diseases like Nosema. Without fresh air circulating during winter, these diseases thrive in the moisture and have been known to lead to winter deaths.

To release the moisture in your hive, you'll have to make sure there is good ventilation throughout it. The heat & humidity that traveled upwards needs to have somewhere to go before it turns into moisture.
There are quite a few ways to add ventilation to your hive, so we've listed a few different options to choose from.
Popsicle Stick Method - This is a really simple answer to ventilating your hive. For this method you'll screw some popsicle sticks onto the brim of your inner cover using small flat head screws.
If your inner cover has an upper entrance notch, then screw the popsicle sticks on to the side with the notch. In the winter the open side of the notch should be facing down towards the ground. This allows the humid heat that forms underneath the inner cover to have an exit to go out of.
The popsicle sticks will add a small loft and crevice for the heat & humidity to exit the hive through. Because the popsicle sticks are so thin, the bees can use propolis to cover over however much space they'd like to. Basically, they can close the window if it gets to cold in their house.
When spring rolls around, you can remove the popsicle sticks.
Cut a Notch Into Your Inner Cover - If your inner cover doesn't already have a notch, you might consider cutting one into it. Cutting a notch into your inner cover is a relatively non-invasive way to add a little ventilation to your hive. Cutting the notch can benefit your hive all year long as well.

In the winter the open side of the notch should be facing down towards the ground. This allows the humid heat that forms underneath the inner cover to have an exit to go out of.
In the summer, you'll flip the inner cover over so that the open side of the notch is facing up -- this will allow your beehive to have a second entrance at the top of your hive if you pull the telescoping top cover forward to create a gap.
Check out the picture to see where and how you should cut the notch into your inner cover. You can use a small keyhole saw - even a pocket knife will do. Cut the notch on the inner cover to be an inch wide and cut it down to the Luan (the wood that has the center cut out in it). Cut on the side that has the larger depth between the Luan and the top of the brim of the inner cover.
Leave Boxes Slightly Ajar - See Picture. This method might just be the easiest one to do on the list. It is done by commercial beekeepers and was originally posted in Howland Blackiston's edition of Beekeeping for Dummies.
With this method you're going to stagger your deep brood boxes by about 1/8". By sliding your deep brood box back a little bit, it will create a gap that the air will ventilate out of. The bees will then add as much propolis as they'd like.
Just be sure that your gap doesn't exceed 1/4" of an inch because it may allow for predators or robber bees to enter through.

Vivaldi Boards - Another option you can do is a little more laboring, but it is especially useful in wet climates. If you live in a naturally more humid area or have a lot of rain during the winter months you may consider buying or making a Vivaldi Board out of a medium super, a few screens and burlap sac cloth.
To make a Vivaldi Board, you'll take a typical Medium Honey Super Box and drill a few holes(1" diameter) in the short sides of the box. See Picture. Take some fine mesh screen and staple it on to the Vivaldi Board over top of the 1" holes so that predators can not enter through them.

Then you'll take the Vivaldi Board and place it on top of the inner cover. Now, instead of filling it with frames and foundations, fill it with burlap sac cloth. The burlap sac cloth is absorbent and will wick away all of the moisture from within the hive. As the moisture collects in the burlap, the wind that enters through the drilled holes will dry the material. This cycle will collect and evaporate your moisture issue away.
Another benefit of using a Vivaldi Board is that you can add dry sugar directly on top of the inner cover before adding the burlap sac. This gives your bees a food source and the loft they need to move around. See more on how and why to feed your bees dry sugar in the section above called: What to Feed (Click Here).
As a caution, Vivaldi Boards are usually lightweight and prone to wind damage, so be sure to strap your hive down or add a very heavy rock on top of the telescoping top cover once it's closed up. See more about this in the section titled: Protecting Against High Winds (Click Here).
Insulate your Hives - We'll get more into this method in the following section called: Insulating Your Hive (Click Here). By insulating your hive, the walls and covers of your beehive will be warmer. If the walls and covers are warm, then the moisture won't turn to water droplets on contact. It will likely stay as a humid airborne moisture, which can easily be vented out by using one of the other methods in tandem with this one.
This method is not recommended if you have extremely warm winters.
Screened Bottom Boards - Screened bottom boards can help create a good amount of circulation that starts from the bottom of the hive. For the most effectiveness, you'll have to use this in tandem with a top of hive ventilation method like the notch, popsicle stick or Vivladi Board methods.
Every screened bottom board you purchase comes with a plastic insert that can restrict the air flow. During the winter it's a good idea to keep the plastic board inserted into the screened bottom board so that there's not too much draft going on. It will still provide quite a bit of draft because the insert purposefully isn't a perfect fit.
We've seen beekeepers tack on tar paper skirts that hang down below their hives. This can trap in some of the heat below your beehive, so when you do have a gust of wind, it collects up the heat and pushes it up through the hive.
Here's our selection of screened bottom boards.


Insulating Your Hive
Insulating your hive isn't always necessary.
If you have critically cold temperatures that are frequently below 20 degrees Fahrenheit, you should consider wrapping your hives.
Wrapping your hives can raise the temperature of the hive and reduce drafts caused by winter winds. When wrapping, it is absolutely imperative that you don't cover over the ventilation holes that you've created. If you do, then you'll be doing more harm than good.
There are two main ways to insulate your hive, either with tar paper or Styrofoam.
Tar Paper - Also known as roofing paper, tar paper is made for protecting your house against the elements. It's water, snow, wind and cold resistant. The dark color is known to absorb the heat from the sun just like asphalt does. Of the two options, tar paper is the easiest to staple or tie onto your hive, but can leave staple or tack marks.

Styrofoam - Doesn't rely on the sun to absorb the heat. It is thicker than tar paper and is better for climates that don't see the sun too often in the winter. Many beekeepers prefer Styrofoam over tar paper because its heat source doesn't rely on the sun (it relies on its thickness). Styrofoam is highly water-resistant and has a better wind resistance than tar paper does due to the thicker insulation.
With regards to installation, Styrofoam takes more effort than tar paper because you'll have to measure and cut your Styrofoam to your desired measurements before installing.
We can't stress enough that if you do decide to insulate your hive, do not cover over your ventilation holes or the main entrance with insulation. Over weatherproofing your hive will do more harm than good.
Feed & Check
There are plenty of steps that beekeepers can do to winterize their bees. Some of these efforts make sense, some are bizarre, but when it comes to the essentials, this is the final step in the winterizing process that we'll mention. When you have a warm day, feed & check on your bees.
Wherever you are in the world, it's likely that the temperature in your area fluctuates back and forth during the winter. By rule of thumb, you should have no fear opening up your hives to quickly check on them when the temperature is around 50 degrees Fahrenheit. But! If the temperatures in your area never reaches 50 during the winter, it is still necessary to check on them on your warmest days. The reason is because the small amount of time that you'll spend in your hive has far less likelihood of killing your hive than them running out of food!
Checking your hive can be as simple as cracking open the telescoping top cover, peaking in through the inner cover's cut-out and looking (or hearing) for signs of life. It's probably not a good idea to pull out the individual frames and check how your queen is doing. You'll have to trust in the prep work that you did before winter hit.
Before looking for signs of life, be sure to go out to the bee yard with a bag of dry sugar. The reason is because you'll also want to check their food supply. Through the winter it's best to use a dry food option because using a typical mason jar or frame feeder can freeze over and act as an ice cube that cools down your hive. Instead of liquid feeders, put a pile of dry sugar on top of the inner cover. There are plenty of other food options for the winter, for more on this see the section called: What to Feed (Click Here).
Remember when checking your bees during winter, do it as quickly as possible so you don't release too much heat. See if their alive, feed them if they need more food, and kick off the snow from the tops of their hives to help them fight fight fight through the winter.
In Conclusion
The bees that we take care of as beekeepers no longer live in their natural habitat. We've now put them in manmade boxes that expose them to the elements of winter a little more than they would have naturally chosen for themselves. This is why we need to help the bees survive the winter as much as we can.
There are plenty of steps in this article that can lead you to a more successful winter. Probably more than you would have guessed there were. Please know, that if you skip a step or two, it doesn't mean that your colony is going to die. All of these steps are just supposed to increase their odds.
The fact of the matter is that first year beekeepers, and even experienced beekeepers, often lose some of their bees during winter. Please do not be dismayed by this. You are doing a great service to the world for even trying. Beekeeping is a journey that involves life-long learning and trial & error. If you know something didn't work for you this year, you can change it up for next year.
I wish you the best of luck!
Keep On Beekeeping On!
-Lane